Table of Contents
Instructions #
To create a file in ProVide HTTPS press the “New File” button. If this button doesn’t appear, it is probably because you do not have write access to the directory you are located in. To get write access please contact your ProVide Server admin.
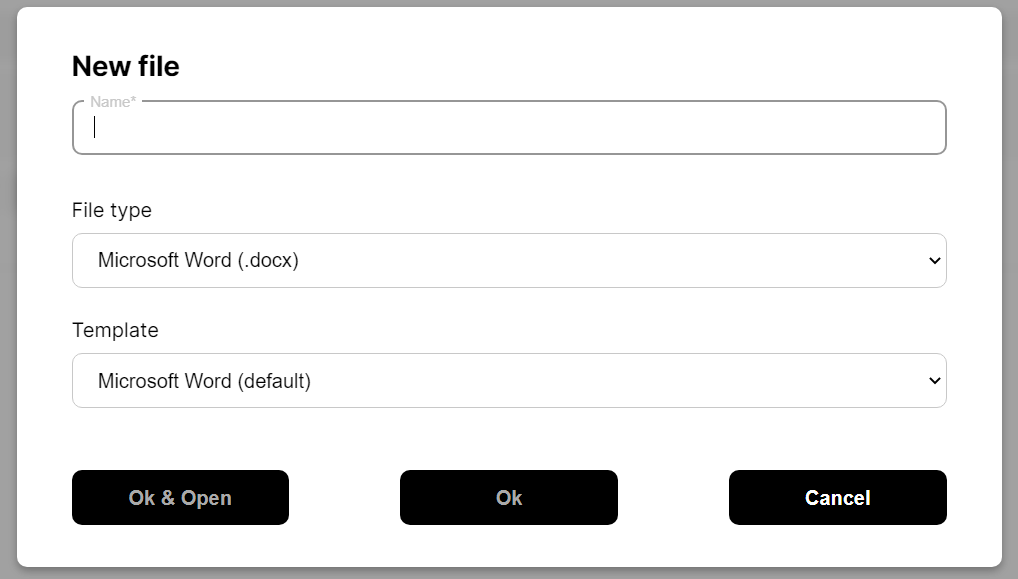
After pressing the “New File”-button a dialog window will appear. Below you can see a picture of how it should look like.

Here is a quick rundown of all the fields:
- Name*: This field is required. It will set the name of the file. If the name ends with a viable file extension (.docx for example) the file type below will change to match the extension.
- File type: Here you chose which file type you want to create. The supported file types are set by your ProVide Server admin. On more information about this go here.
- Template: Here you have the ability to use an already existing file as a starting point for your new created file. To add a file as a template contact your ProVide Server admin. For more information about how to do this go here.
- Ok & Open: This button creates the file and opens it for editing on your computer. This button will require ProVide Link installed and that you have permission to edit files. This permission is set by the ProVide Server admin. For more information about editing files go here.
- Ok: Simply create the file according to the information you have put in the fields. It will now show up in your file tree.
- Cancel: Closes the dialog window and all information put into the fields will be thrown away.


