Choose your version for downloading, either 64 bits or 32 bits.
Run the downloaded ProVide_Setup.exe file. If you haven’t downloaded ProVide yet you can do that from here:
License agreement #
The first thing you are faced with is the (rather short) license agreement which must be accepted by clicking the checkbox before you can proceed.
Click the checkbox and then Next.

Components & Password #
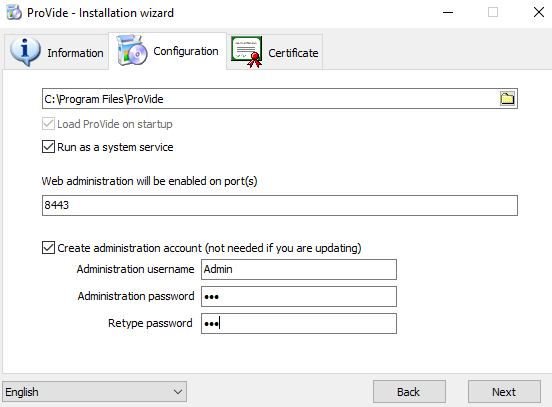
Here you select where you want to install ProVide and if you want to run it as system service or if you want to start it manually. You will also need to set a password because ProVide requires a password for accessing the administration interface. Remember this password as you will need it to configure the server. You do not need to set a password if you are updating a previous installation of ProVide – if this is the case, uncheck the checkbox above the Administrator info.
Enter your password.
Click Next.

Certificate #
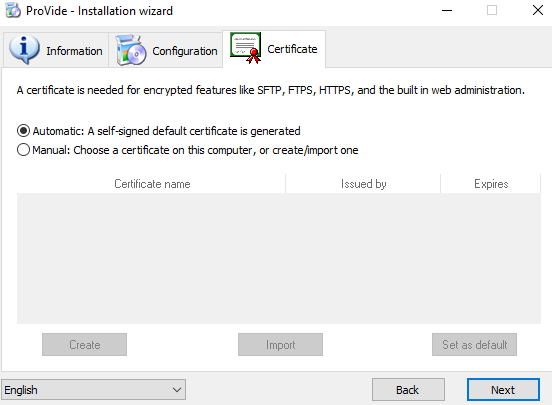
Here you select which method you want to create a certificate for ProVide with. You have two options: Automatic or Manual. Choosing Automatic will generate a default certificate for you, while choosing Manual will require you to fill in some information in order to create one.
Choose an option and click “Next”.

Finishing the installation #
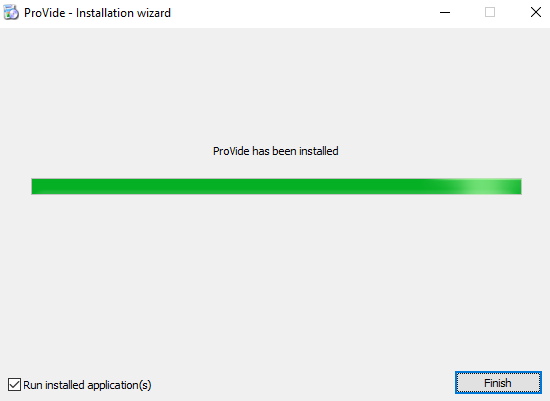
Once the installation has completed, simply press ”Finish” to finalize the process. If the checkbox in the corner is active then all installed applications will automatically start.
Click Finish.


